« To Studio visual effects and virtual backgrounds: Overview
Virtual backgrounds hide your current background with a digital backdrop, making your space look more professional and enhancing the brand and feel of your recording.
Who: Hosts, producers and guests
Plan: All plans
Device: Computer browser, iOS app, or Mac app
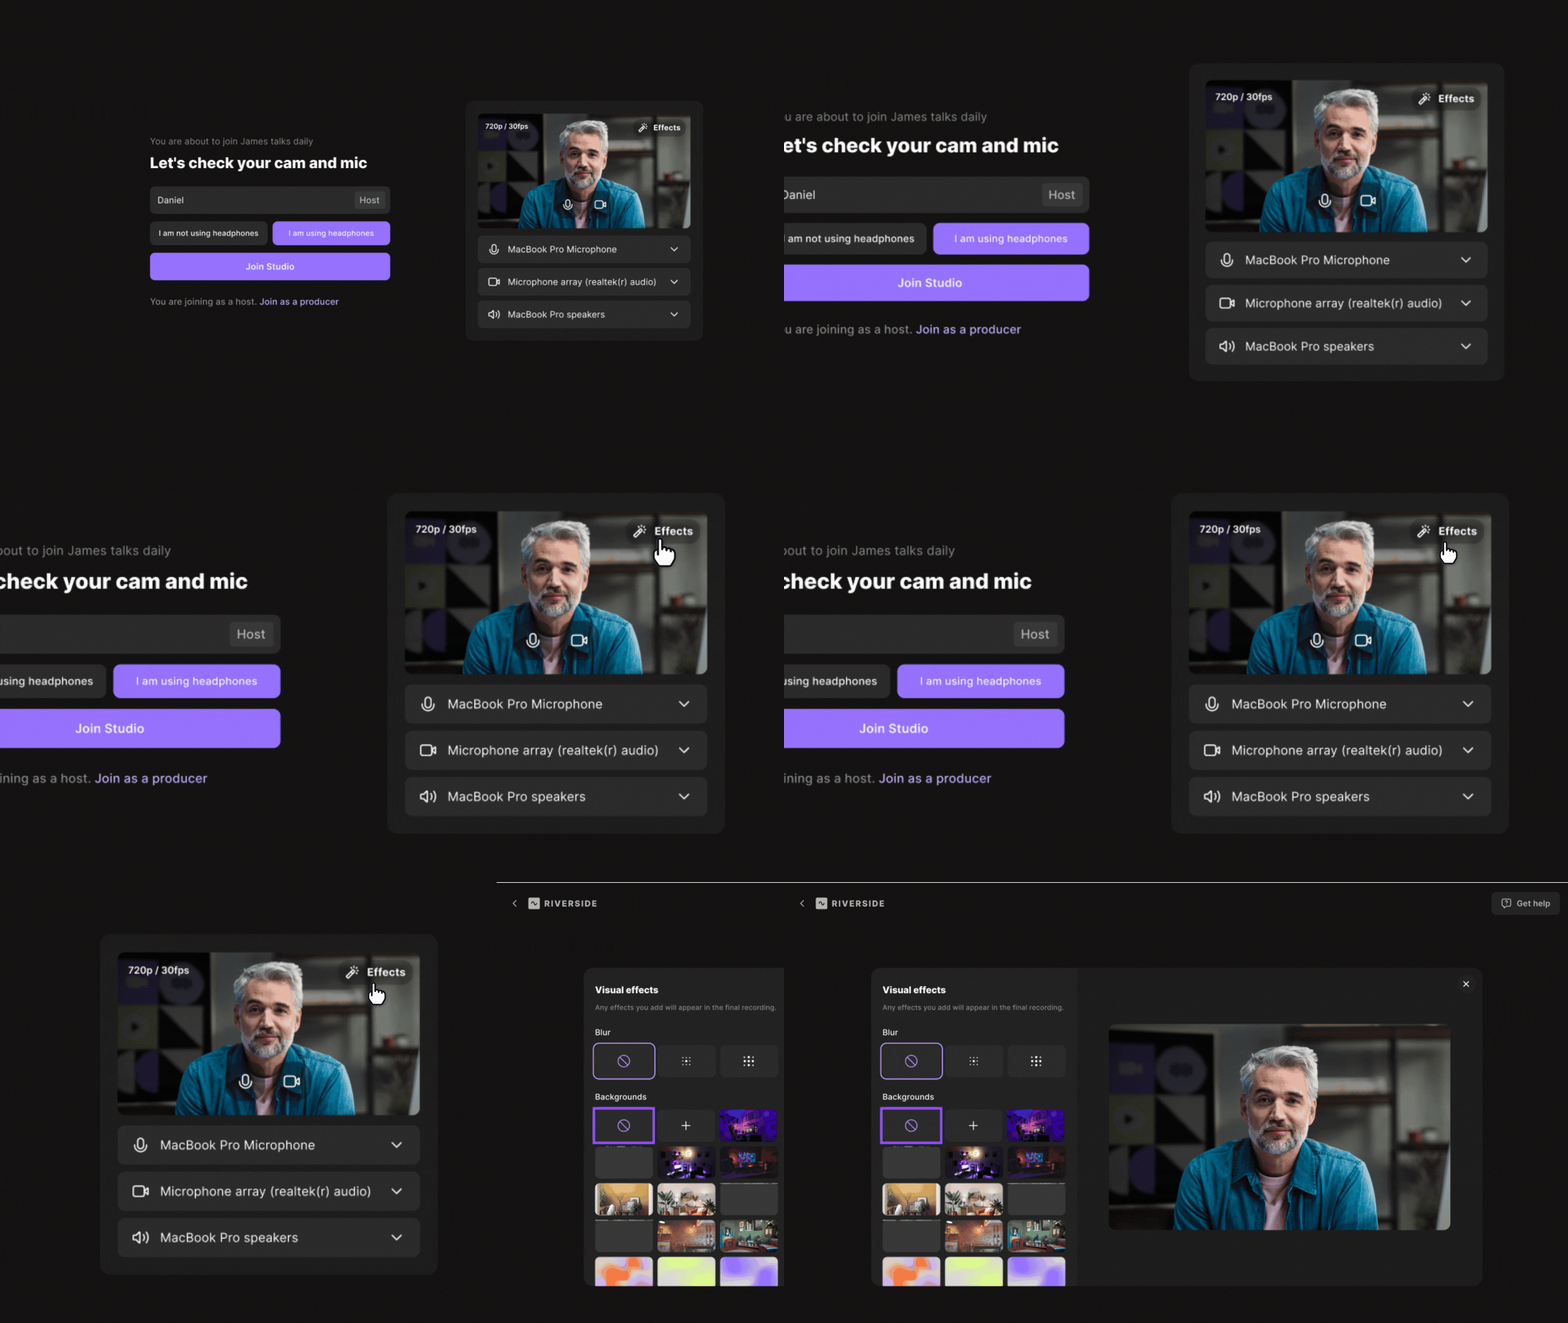 Step by step
From the lobby
- From your computer browser or Mac app, join a Riverside studio.
- On the lobby page, hover over your video tile in the video preview and click the
Visual effects icon.
- On the panel under Backgrounds, choose a background.
- Click the X to close Visual effects panel.
- Click Join studio and enter the recording session.
From the studio
- From your computer browser or Mac app, join a Riverside studio.
- Ask the host to stop the recording.
- Hover over your video tile and click the
- On the panel under Backgrounds, choose a background.
- Click the X to close Visual effects panel.
From the Riverside iOS app
- Download and launch the Riverside iOS app.
- Tap
Record.
- In the bottom right of the lobby screen, tap the
- Choose a background.
- Click the X to close Visual effects panel.
 Good to know
- Visual effects are not yet supported for studios set in 4K. Be sure your studio is set to 720p or 1080p to access visual effects.
- System requirements: Devices must have 8 or more physical processing cores.
- Virtual backgrounds and blurs are included in the final recording file.
When a virtual background is removed, the recording stops and a new one starts.
Virtual backgrounds do not work with the mobile as webcam feature.
The background is present in both local and cloud recordings.
Virtual backgrounds appear mirrored in your own video preview. Other participants see the background in its correct orientation, and it appears correctly in your final recording.
Each participant controls their own background, only that participant can update their background.